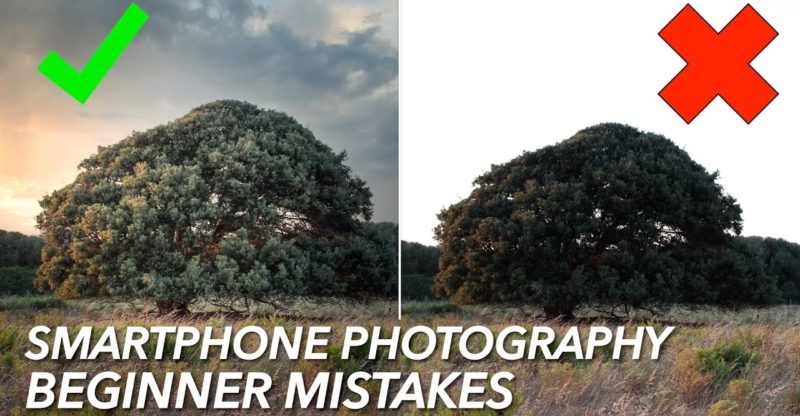
Top 10 Smartphone Photography Beginner Mistakes
We take thousands of photos with our smartphones. Unfortunately, only a few of them are really
good photos. It hardly seems to be due to the hardware,
because in many cases a smartphone photo can hardly be distinguished from a photo taken
with a professional camera. In this video, I'm going to tell you 10 mistakes
that especially beginners make in their smartphone photography. And please don't think that I believe that
I always take the perfect photo. Unfortunately, I still often make the same
mistakes myself. But today I'm all about showing you these
mistakes and at the same time giving you 10 tips on how to improve the quality of your
smartphone photos.
So let's get started. You have no idea how light affects your photo. People often say that photography is like
painting with light. What you should be left with from that statement
for now is that proper exposure and the right light is one of the most important factors,
if not the most important, in whether you will take a good photo or a bad one. And that doesn't change with smartphone photos. Portraits and even landscape photos in harsh
sunlight will rarely be good photos. The landscape photo will look boring and the
portrait will have unsightly shadows. So pay attention to the light. Here are just a few quick tips on what to
look for in lighting: prefer soft light, such as the light in the evening or morning to
take your photos.
Shoot your portraits in the shade or even
against the sun. So avoid taking portraits under the direct
sun or with the sun behind you. You don't change any settings on your smartphone
and just always shoot your photos with the default settings. It's quite typical to take photos with your
smartphone by simply pulling out your phone and quickly taking a few photos. You don't even think about the fact that the
camera app would also offer the possibility to manually change or fix the focus or exposure,
for example. Besides, both IOS and Android now offer you
really interesting and creative features that you could use for your photos.
This could be lighting settings in portrait
mode or interesting effects for LivePhotos. If you have an iPhone, I would like to recommend
you my detailed video about the camera settings for the iPhone. You don't really think about the right image
composition. Ok, the topic of image composition is a very
extensive topic and there are quite a few tutorials on this topic. However, the lack of composition is particularly
noticeable in smartphone photos. The reason is the same as before: you take
out your phone and quickly take a few photos – one will hopefully look good.
Here are a few quick tips for your composition:
Don't always put your subject in the center, but at least sometimes consider the rule of
thirds. Make sure your image doesn't look overloaded
– too much chaos will ruin your image. Instead, think carefully about what the image
should be about and then put it in focus. Sometimes it helps to get closer. Pay special attention to the foreground and
background. Sometimes objects in the foreground can add
depth. Sometimes the background is too distracting
– this is also a very important topic. you shoot all your photos from the same perspective
– this is actually closely related to the last issue. If you always hold your smartphone at the
same height, for example at eye level, and always take the photos at the same angle,
then your photos will often look boring.
Remember, photography can not only document,
it can also be an art form. Especially with a smartphone, it's possible
and also very easy to try out unusual angles and perspectives. For example, if you take your photo from the
bottom up, your subject will look bigger; from the top down, it will look smaller. Just try some interesting angles. You'll see it's fun and your photos will look
more interesting very quickly. you don't edit your photos.

Most smartphone photos are not minimally edited. However, good editing can turn a boring photo
into an interesting one. Besides that, it's the editing that can make
all the difference. You can be sure that most owners of large
Instagram accounts edit their photos. Sure, many of these photos are taken with
professional cameras. But even a smartphone photo can be greatly
improved. Check out a few apps and learn how to use
them. For example, I recommend the app Snapseed. It doesn't cost much and has all the important
features you need. you always use the same exaggerated filters. You don't edit your photos, but you always
use the same Instagram filters or filters from your smartphone app.
The app I just mentioned, Snapseed, has a
few filters in addition to the editing tools. A few years ago I used to apply the same filter,
in my case HDR-Scape, to all my landscape photos. It just looked spectacular to me. But the result was usually completely over
the top, had too much sharpness and just looked unrealistic. Today I find these pictures terrible. From this experience, I can only recommend
that you reconsider the use of filters. This is especially true for the default filters
of smartphone apps. Sometimes such a filter can look quite good
and enhance the photo, but often this is not the case. you always take your photos in portrait mode. At the latest since Instagram has become so
important, smartphone photos in particular are taken exclusively in portrait mode, or
rather vertically. This may also be the right decision for Instagram
most of the time. Nevertheless, the portrait mode is absolutely
not always the best choice for a photo. Especially when it comes to photos of landscapes
or photos that show people in a special environment, it can make sense to hold your smartphone
horizontally sometimes and shoot a photo in the so-called landscape mode.
I think you are absolutely aware of this,
but you have become accustomed to holding your smartphone vertically all the time. you don't know the limits and weaknesses of
your smartphone camera. Your phone's image processors are able to
create beautiful photos from an extremely small sensor and an extremely small lens. The image is heavily processed by your smartphone
so that it ultimately looks the way it does. And the results are incredible, even in low-light
conditions. Nevertheless, your smartphone camera also
has its limits and weaknesses. On the iPhone 12, for example, the main lens
produces much better photos than the ultra-wide lens, especially in low-light conditions. Thus, the ultra-wide lens definitely has its
weak points. You should know that, though, if you want
to take better photos with your smartphone. Depending on the smartphone, poor lighting
conditions are still difficult to handle for many devices and a clear weak point. Even backlit situations or shooting directly
into the sun can often lead to unattractive results. you shoot too many photos and don't save them
properly.
The fantastic thing about a smartphone is
that you always have it with you. This allows you to take photos in situations
where you normally wouldn't have had a camera with you. However, this often results in a huge amount
of photos that you never look at again. I'm thinking of young parents, for example. Everything and every situation is captured. I know this from experience. Please don't get me wrong: interesting and
funny pictures are also created. But often it's just too much: the photos rot
on your smartphone's memory. And here's the next problem: you don't transfer
your photos to your PC often enough and you don't organize them properly. If anything, you're transferring your photos
to the computer and they're stored there in a folder without any additional organization. You'll find the photo you're looking for with
difficulty and a lot of effort. This is where programs like Lightroom or even
just Apple Photos can help you get some order.
You don't take enough time to take your photos. The final mistake basically sums up everything
I've said today once again. Yes, you can take great photos with smartphones. But to take a good photo you have to take
your time. You should think about the location, exposure
or how the person you are capturing is posing. All of that takes time. So now I don't want to steal any more of your
time. Give some thought to everything I've said
today and just practice a bit. You will see, your photos will improve quickly. if you want to add some typical mistakes or
tips yourself, just write them in the comments If you liked the video, give me a like as
feedback, subscribe if you want to see more tutorials like this one and see you next time!


